
Welcome, everyone! I sent out a post on my Instagram asking my followers what kind of tips and tricks they would like to learn when it comes to using digital scrapbooking products in hope of starting a short series here on my blog to teach the tips and tricks of Digital/Hybrid Scrapbooking. I have yet to read your responses, but I am here to launch this series and share how I came up with TWO awesome projects using only ONE digital template created by Theresa Moxley of Larkindesign.
So, as some of you might know if you visit my blog often, that I am currently on two teams where all I receive are digitals. I mentioned this in my Insta post, I had to be honest, and that was the fact that I never imagined myself taking this road in the many many roads to choose of paper crafting. I always thought that I would stick to my paper loving projects, and even though I still do, I have been loving this new phase of my paper experiences and that it DIGITALS.
You guys, I can’t rave enough about the amazing flexibility that comes from digital scrapbooking products. You can use it all on your computer OR you can print it all off in the comfort of your own home and get crafty with it physically. It’s all up to you and you don’t just get one option, nope, you always have those two to choose from.
So, today I am here to share with you some awesome templates that will be releasing at Larkindesign and how I used them to create a digital layout and then how I printed that one and created a final physical project. These are the templates available for purchase at Larkindesign here:
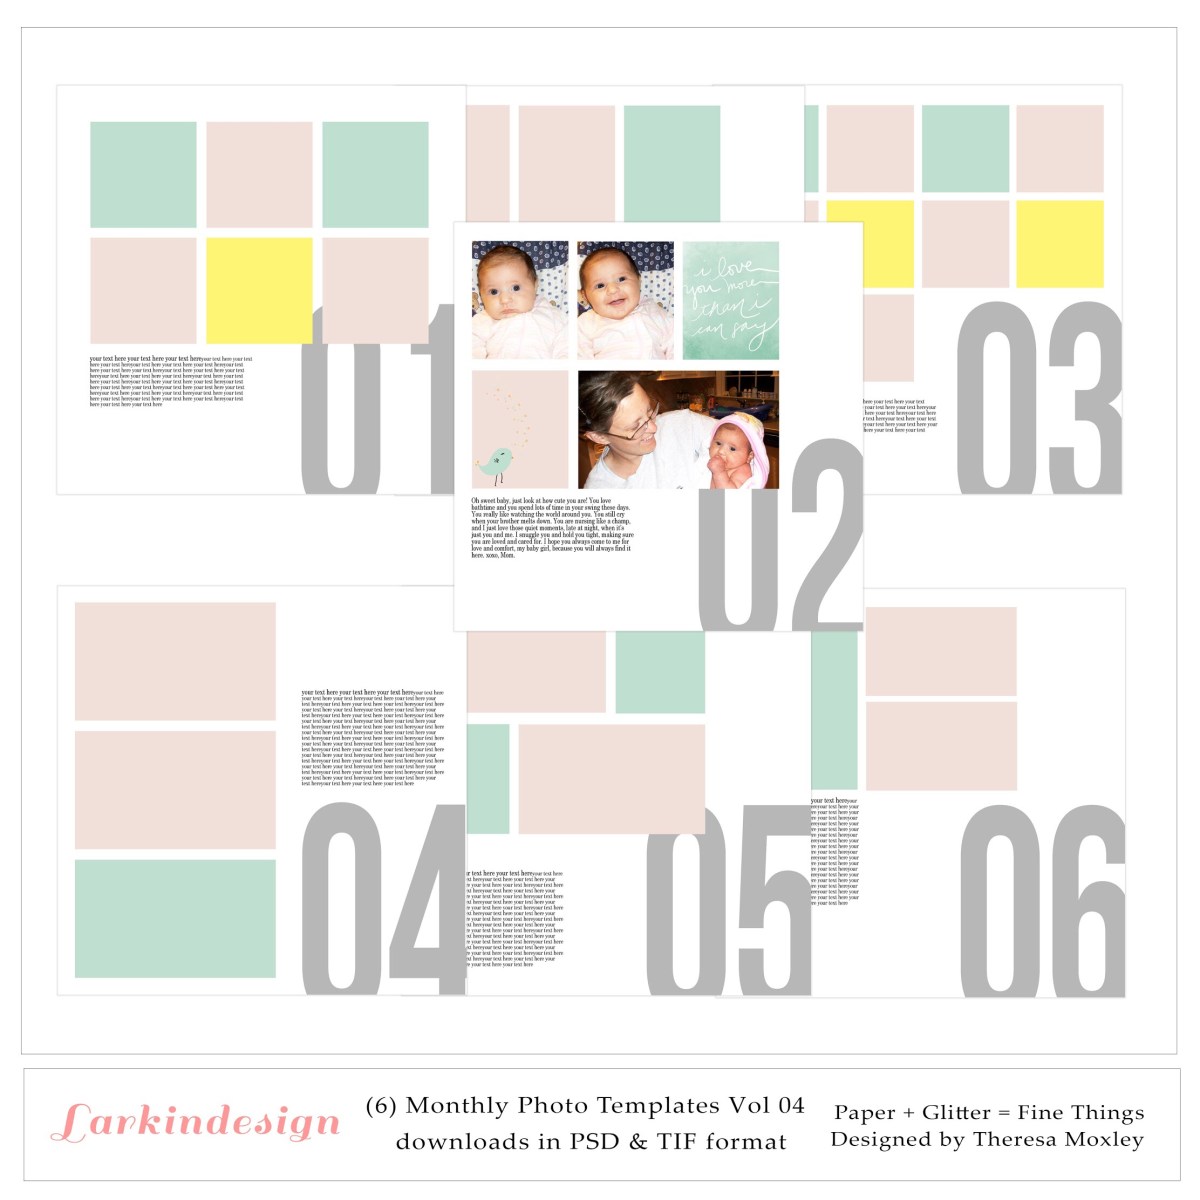
These templates were created by Theresa to create awesome and simple layouts straight on your computer using Photoshop!
If you are interested in viewing a whole process of how you can use them on your own computer, I would highly recommend that you watch Theresa’s full tutorial here.
This was the tutorial that I watched before getting crafty on my own digital project. So enough teasing, here it is:

As you can see, this is definitely a digital layout. The photos, the text, and the numbers were already placed there as part of the design. All I had to do was come in to add my own personal touches like the colors of the numbers, the text explaining my story, and the photos. Now, it’s not exactly perfect, as you can see my photos are a little wonky and seemed a little too stretched.
However, I am still so happy that this could be quickly done! I also love the fact that I was able to add text, as I normally don’t include much journaling in my normal layouts. I think I would love to keep creating these digital pages when I feel like including more stories to go along with my photos.
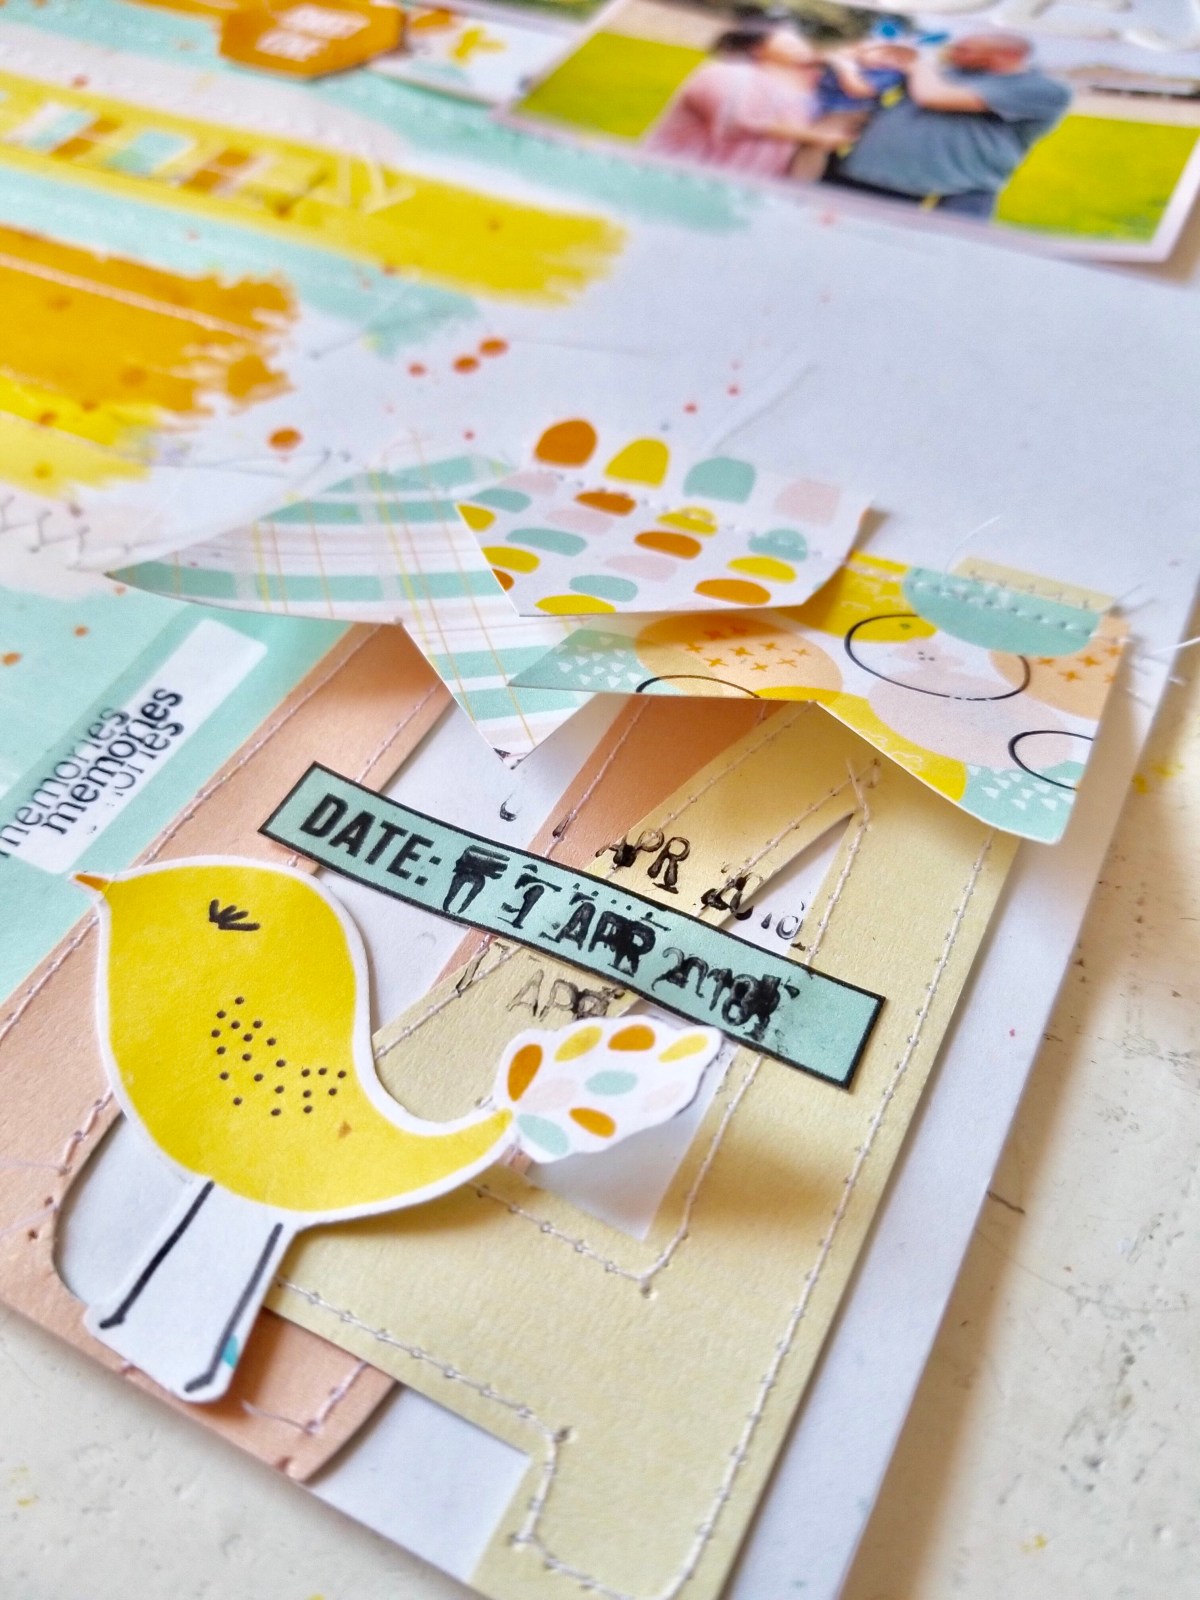
So, once I was finished with this layout, I decided I would print it out. The template itself is formatted to print on 12×12, but I simply changed the settings so that the full image would print on an 8 1/2 by 11 sheet. Once I had the physical printout of this sheet I cut out the objects to add them to this awesome striped paper from the April “Sweet Chicks” collection.
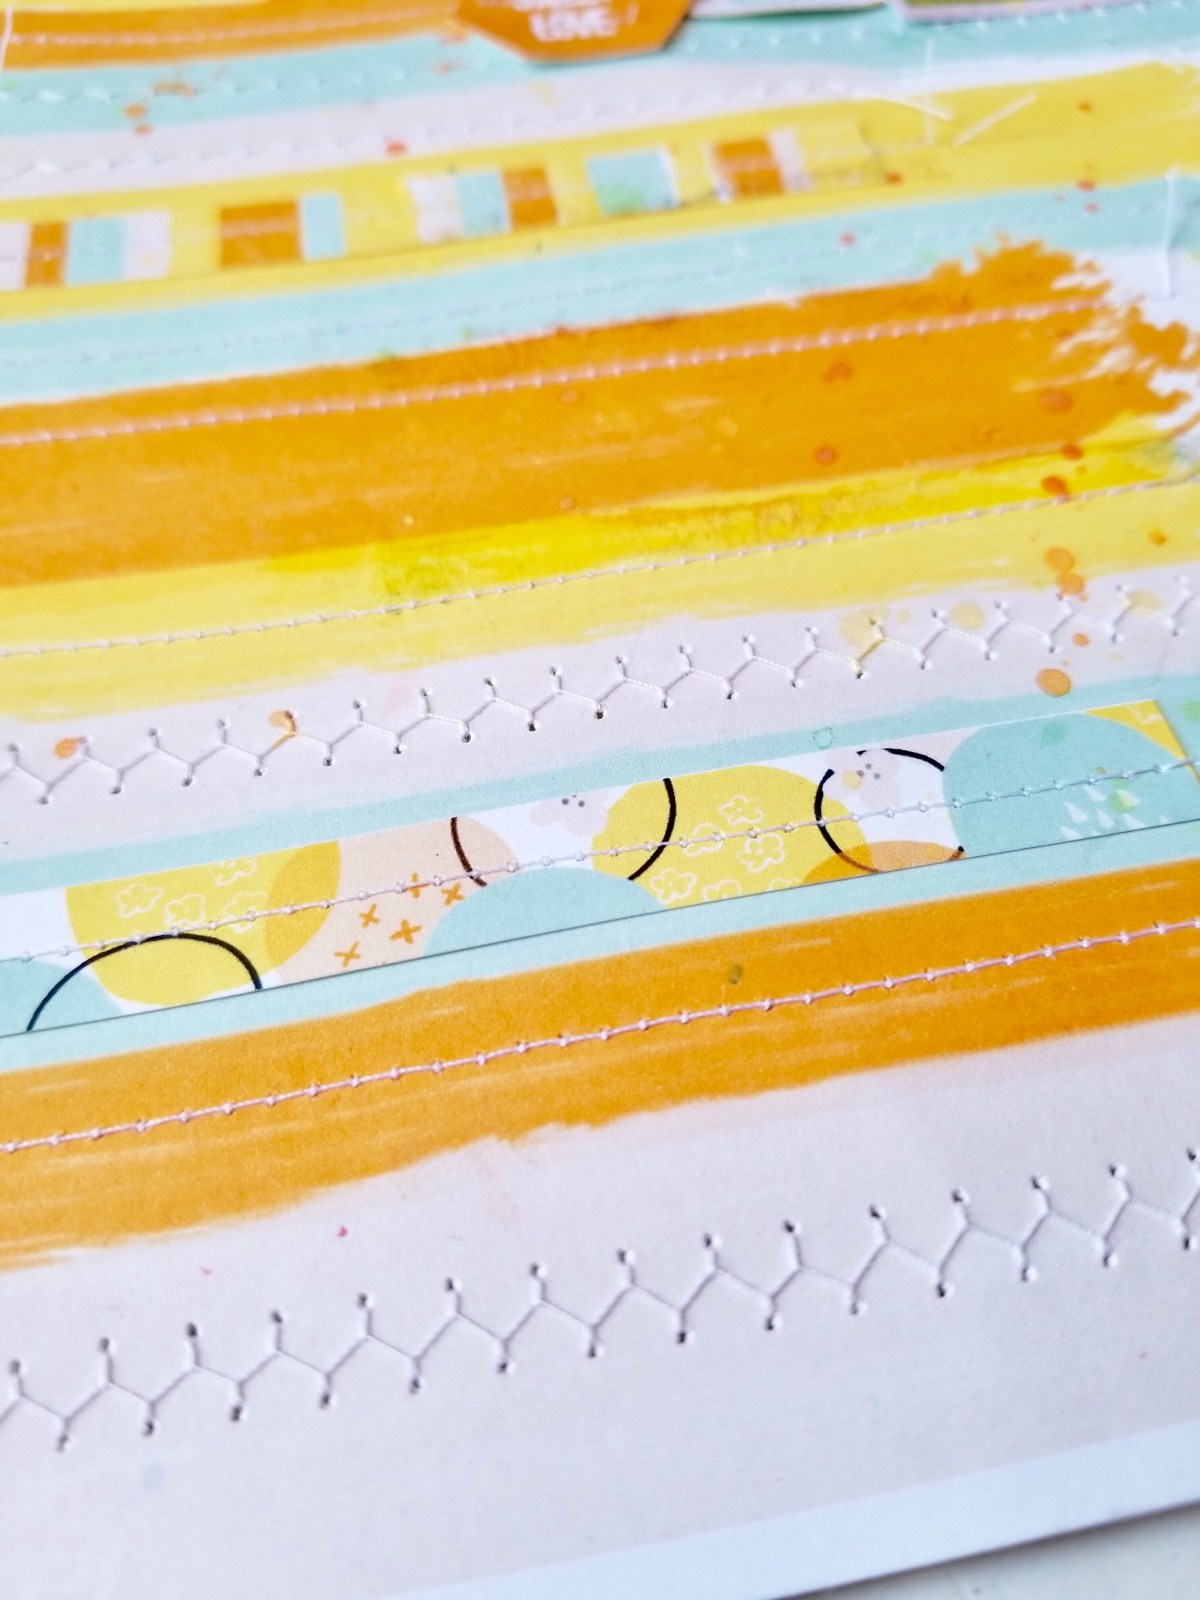
This paper, also a digital, was simply printed on an 8 1/2 by 11 sheet of card stock in my own home printer. Once I knew I wanted to use this as my base for the layout I wanted to create, I added stitching to each of the lines and even included some pieces from the cut apart sheet (also part of the April collection!) to add a little bit of interest and dimension.
So like I said, I cut the photos from the digital printout and the numbers and turned them into a physical layout! Here is the full spread:

It’s the same photos, and numbers, but done up! I used a cute “Good Vibes” title from some of my Dear Lizzy stash, and added the Easter word which I also cut out of the main template.

I added the photos together and didn’t even have to back them because they were already sitting atop the pink from the template.
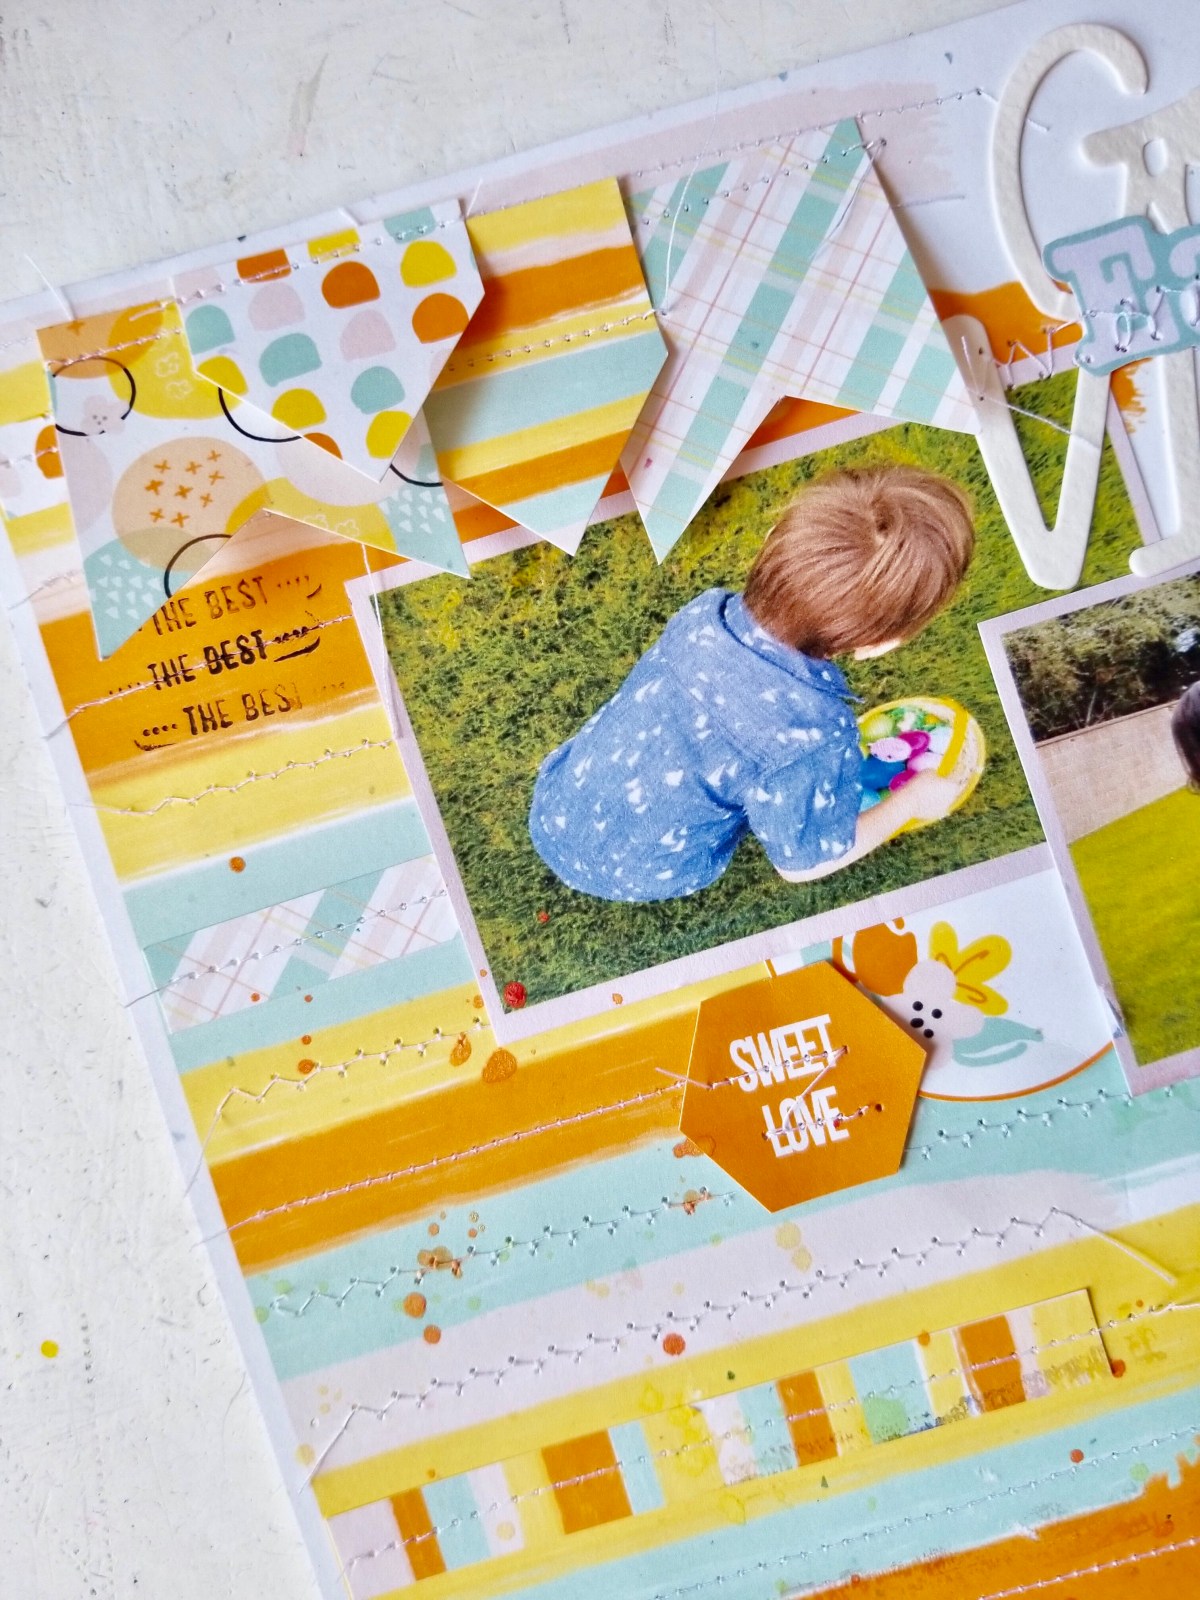
Finally, I added to numbers to the same bottom corner after I stitched around them and added a few more embellies all around my page using whatever fancied me at the moment. Those penants, tho!
TWO layouts, ONE template!!

So now I want to challenge you to give these awesome templates a try! Whether you’ll keep them just as is digitally and print them to add straight to your books, or you print them and redecorate as your heart desires, these templates are the perfect tool for that!
Now I will ask you the same question I asked my followers on Instagram, what other things would you like to learn about digitals?
There are so many ways to work with them, and I would love to be able to guide you all along the way. If you have any questions or topics you’d love for me to touch on, leave me a comment below!
As for now, I will leave you with this and I will be back very very soon! Stay crafty, cuties.

Discover more from All the Neffyness
Subscribe to get the latest posts sent to your email.
